Tuesday, May 15, 2012

One thing one week challenge (13)

I needed to make something for a gift so I used some pretty pink Denyse Schmidt fabrics to make up another of Ayumi's wonderful fabric baskets..
 I cut my squares at 2 1/2 inches so the basket comes out a little larger and taller than the original pattern.
 Perfect to fit lots of goodies in.....


Amy's Creative Side
Linking to Amys One thing One week challenge (13) and Fabric Tuesday at Quiltstory (buttons in left sidebar).
Kirsten.

Sunday, May 13, 2012

Zakka sew along - Itty Bitty Teeny Tiny Magnets

I managed to get a bit of time this afternoon to make these magnets. I thought after last weeks fun and games with the pencil pouch that the Zakka projects couldn't get any trickier but these were even more fiddly!!  .
The blocks themselves were easy enough to make as the directions in the book are very clear  - I used a tip from here to make the 9-patches,  I would have liked to have taken the time to quilt these by hand - maybe next time:)  Anyway, they are kind of cute and colourful for putting on the fridge.......
Linking to LR stitched.
And thank you to everyone for their very kind words on the HST mini quilt tutorial!
Kirsten.

Thursday, May 10, 2012

Ireland hopping

Hi everyone, I am doing a guest post on Sarah @ Fairyface designs blog today as part of her {Sew} Get Started tutorials. Sarah kindly invited me to do a tutorial to make a mini quilt using half square triangles.
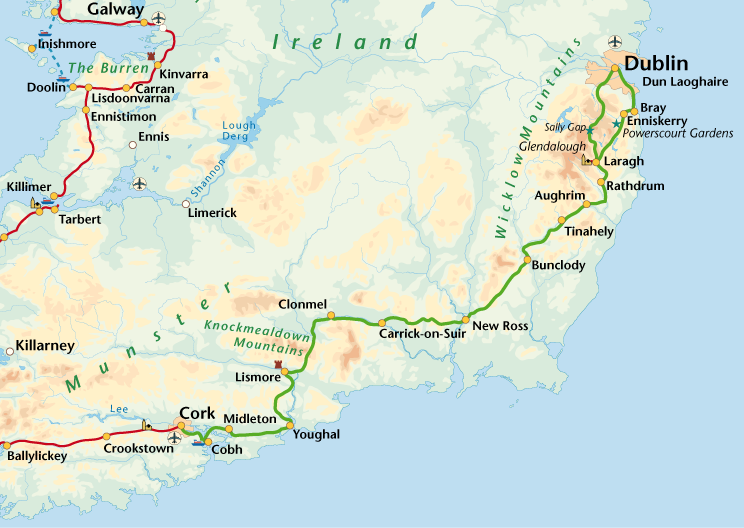
I was just doing a little bit of research on Cork which is where Sarah lives, and found that in the next county to where she lives, there is a place called Lismore. I live in another city named Lismore, in NSW, Australia which was possibly named after the Lismore in Ireland as it has fairly similar scenery. Lismore (Ireland) and Lismore (Australia) are twin cities
I really want to travel to Ireland one day but for now this is as close as I can get to being there. So please pop on over to Sarahs to see the tutorial.
FairyFace Designs
If you have come here from Fairy Face designs to have a look round, thanks for stopping by. 
PS: I have used fabrics from Denyse Schmidts' "Daisy Mae" range.
Linking to LIttle Quilt Monday at Pieceful LIfe.
Kirsten.

Wednesday, May 9, 2012

Denyse Schmidt mini quilt swap (2)

Tomorrow is the posting day for the DSDQ swap round 2. Once again there are some lovely mini quilts in the flickr group.
This is the mini that I have posted off to my swap partner. She mentioned she liked piecing so I have done a spider web block using the tutorial at Sew Mama Sew by Elizabeth Hartman.
I just sewed diagonally through the centre "web" and did simple echo quilting and sewing around the blocks with a blue variegated Guterman thread.
And I think I used nearly every blue DS fabric that I had here.
The "extra" item I am sending is a Zakka style pincushion using some linen paired with a couple of other DS fabrics.


Hopefully this wont take as long to get to her as my previous package to a swap partner!
Linking to Sew Modern Monday at Canoe Ridge Creations, Fabric Tuesday at Quiltstory, and Little Quilt Monday with Elizabeth at Pieceful Iife.
Kirsten.

Sunday, May 6, 2012

Zakka sew-along : Pencil case

The Zakka Style project for week 5 was a pencil case/pouch. This was quite a tricky project and there was a lot of swearing seam ripping involved in making it! 
I decided to use some Joel Dewberry  Heirloom fabrics in the Citrine colourway as they look lovely against the linen.
I have seen a few others using the "pencil case" for storing other items - crochet hooks or reading glasses for example. 
But I want to use mine to keep my rotary cutter in so I added a layer of wadding to the inside. 
And it fits perfectly!
Linking to LR stitched, Sew Modern Monday at Canoe Ridge Creations and Fabric Tuesday at Quilt story (buttons in left sidebar).
Kirsten.

Friday, May 4, 2012

{Sew } Get started: Mini quilt

FairyFace Designs


Hi everyone! I would really like to thank Sarah for inviting me to do this tutorial which uses half-square-triangles (HST's) to make  a mini-quilt which finishes up at about 16 inches square. 
You will need: 
18 pieces of patterned fabric cut into 3.5 " squares (I have used a variety of red, green and blue fabrics)
18 pieces of a solid fabric cut into 3.5" squares
a piece of backing fabric approx 18 inches square
piece of wadding at least 17 inches square
fabric for binding


1. Lay a piece of patterned fabric on top of a solid square right sides together.
2. Using your ruler, draw a pencil line along the diagonal from corner to corner. Do this for all 18 pairs of patterned/solid squares.
3. Stitch 1/4" seam on each side of the drawn line.
4.Cut apart on the pencil line which is halfway between your 2 rows of stitching.
5. Press seams - you can press them toward the dark side or open.
6. Trim all of the HST's back to 3 inches square 
7. You will get 2 HST's from each pair of patterned/solid fabrics so you should end up with 36 HST's.
8. Place the HST's in a 6x6 arrangement - I am doing a pattern similar to this :
There are many design ideas for HST's though - here are just a few other options using the same amount of HST's (36):
9. Once your HST's are laid out in the desired pattern, pin and sew the rows together using a 1/4 inch seam (refer to Sarahs post for more information).
10. Press seams to one side - alternating directions between rows. (ie. Press row 1 to the left, row 2 the right, row 3 to the left , row 4 to right, row 5 to left and row 6 to right).
11. Pin and sew the first 2 rows together - by pressing then seams to the left and right, you will be able to "nestle" your seams so they lie flatter.
12. Continue joining the next set of rows (3 and 4)  together, and then rows 5 and 6. Then sew the 3 pairs of rows together to complete the quilt. Press the seams to one side and trim the quilt top back to square - it should be almost 16" square.
14.  Making the quilt "sandwich" - place the backing fabric right side down (mine is navy so it is a bit hard to see here), and put the wadding on top.  Lay your quilt top right side up over this and smooth out any wrinkles.
15. Baste your quilt to keep the layers in place - I have used special quilting safety pins but you can also use spray. 
16. Quilt as desired - I have just done echo quilting along the edges of the patterned HST's.
17. Once it is quilted, trim back the edges of the wadding/backing and bind. Binding has already been covered in these tutorials so please refer to them here

18. Step back and admire your finished mini quilt! 
I made up a couple of minis in different designs - pinwheels for this one, quilted in straight lines:
And then Chevrons which I have handstitched in perle cotton:
I hope you have enjoyed this tutorial and if you have any questions please leave a comment and I will get back to you. 
Kirsten.

Wednesday, May 2, 2012

Two Out of Three Ain't Bad

Well, according to Meatloaf anyway. I only managed to do 2 out of my 3 "Just Three" April projects last month but that is ok as I did do a few other things to make up for it:) 
1. The scrappy Swoon block was made into a pillow - complete with groovy orange stitching.
2. I didn't get any further with my Daisy Mae Swoon blocks although I have the fabric cut and the geese made - I only have 6 blocks to go but they seem to be taking forever to get done as I keep starting other projects......................


3. And I did make something for me - upon joining in the Zakka sew along, one of the first projects was a sewing kit so I used some scraps of Echo and linen to make this. And I really love it!
Now for Mays list:
traceyjay quilts


1. Finish off my DSDQ mini quilt so the package can be posted next week. This is the block I have started with:
2. Finish writing a tutorial for a post on Sarah @ Fairyface designs blog next week as part of her {Sew} Get started tutorials series - need to get onto this ASAP!!!  
FairyFace Designs


3. Continue doing some of the Zakka sew along projects each week or so - these are such lovely things to make!
Linking to Traceyjay quilts  blog for Just 3 things, and also to WIP Wednesday at Freshly Pieced.
Kirsten.